Wednesday, July 29, 2009

Week 7 Maple Creek Farm CSA 2009 - July 29, 2009


What we got this week and how I plan to use it:

Lettuce - Salads as usual :-)
Red Onions - Probably will slice and put with the lettuce and some bean salads
Summer Squash - BBQ, yum!
Cucumbers - Put in those salads or cut into sticks for snacks for the kids
Cabbages - Not quite sure yet. They store for awhile, so I might save them.
Basil - In those bean salads
Beans - We're having Salmon tomorrow. I'll use them as a side dish.


Tuesday, July 28, 2009

Week 6 Summary & Review

Mixed Salad Plate
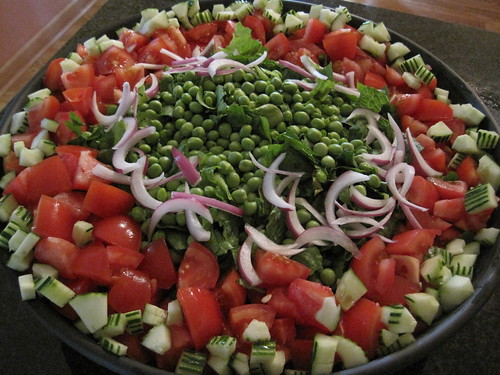
Above: our dinner tonight. I needed something quick, so I made a mixed salad plate of bean salad, cabbage salad, and cut-up cantaloupe.
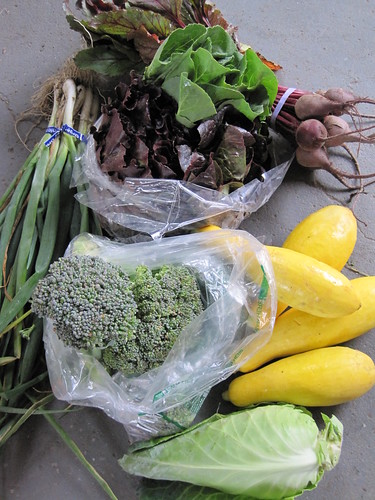
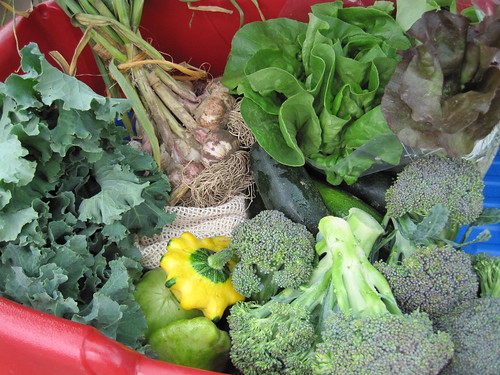
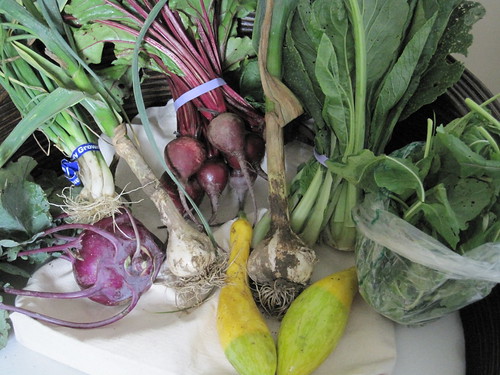
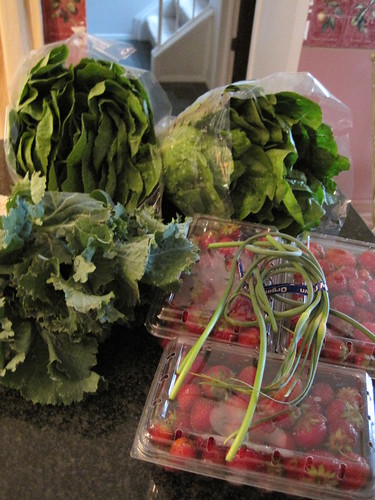
Last week we got:

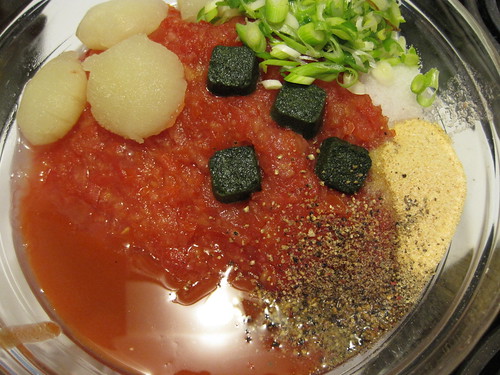
Cabbage: Made the yummy salad on the right above. It was a last minute thing, I was adding things as I tasted without measuring but I think I added about the following amounts to the cut up cabbage: juice of 1 lemon, 2 Tbs Sesame Oil, 1/2 tsp celery seed, 3-4Tbs Olive Oil, Salt & Pepper to taste, 1-2 tsp. of fish sauce some sliced almonds (maybe 3 Tablespoons) and about 1/4-1/3 cup of sliced green onions.

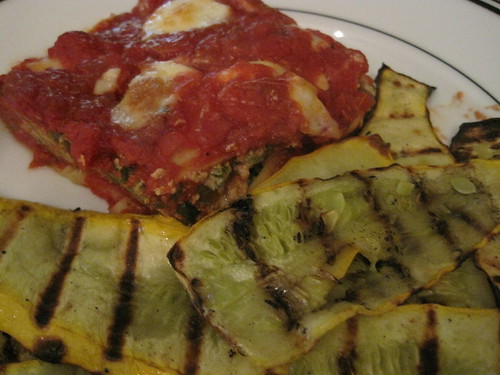
Summer Squash: Grilled them with a little olive oil, salt & pepper.

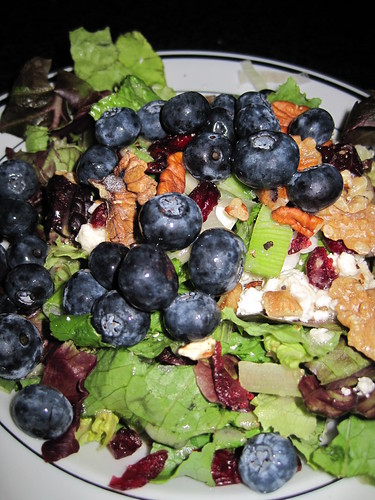
Lettuce: Used it for two days of salads. I bought some feta cheese, walnuts, dried cranberries, and pecans to go with it. The first night we had company, so I candied the nuts (also added some cinnamon and a dash of salt). The next day I had what was left and added some fresh blueberries.

Blueberry Salad

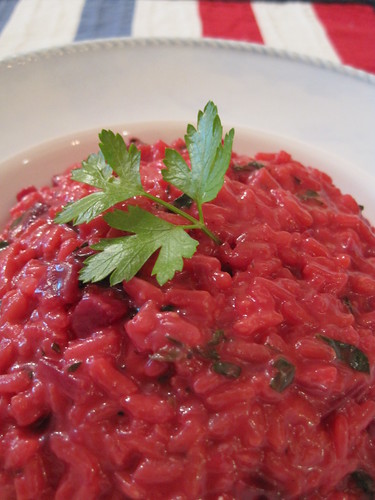
Beets: Roasted them. They are still in the fridge awaiting a good dish. Maybe I'll go eat them now...I'm hungry.

Broccoli: Broccoli & Pasta. Yummy. Still need to post the recipe.

Bunching Onions: Cut up and used throughout the week, probably still have about 1/2 of them left.

Thursday, July 23, 2009

Week 6 Maple Creek Farm CSA 2009 - July 22

This week we got:

Cabbage: Maybe Some Soup? Maybe some Stuffed Cabbage leaves in the Slow Cooker.
Summer Squash: Grilled 2 of them today, will do the same to the other 2 tomorrow.
Lettuce: It is washed and ready to be eaten as a salad. I bought some feta cheese, walnuts, dried cranberries, and pecans to go with it.
Beets: Probably the Beet Risotto again. We just got back from vacation, I'm still recovering and I don't feel like trying something new when the risotto was so good.
Broccoli: Broccoli & Pasta. Never made it last week, will use for a quick dinner on Saturday.
Bunching Onions: I cut them all up and will use them throughout the week in salads, cooking, etc.

Week 5 Summary & Review - Kale Lasagna with BBQ Summer Squash


Here is what I did with last week's share. Even though we were on vacation, I managed to use it all up, I just brought it with me.

Lettuce - made salads
Garlic - hanging in my basement curring
Zucchinis & Patty Pan Squash - Zucchini Soup
Broccoli - We had chicken for dinner one night and used this as a side dish (there were a lot of us)
Kale - Made a pretty good Kale Lasagna as follows:

Kale Lasagna Recipe

16 oz. of Ricotta Cheese
1 egg
1 onion chopped
2 massive (or 4-6 medium) cloves of garlic
1 bunch of kale, washed and trimmed
1/2 cup fresh chopped Parsley
1 box of no boil lasagna noodles
28 oz. can of crushed tomatoes with Basil (I use Whole Foods 365 brand)
16 oz can of tomato sauce (I use Muir Glenn)
Fennel to taste (probably about 1 tsp)
Garlic Powder (probably about 1/2 tsp)
16 oz. of fresh mozzarella, sliced
salt & pepper to taste.

1. Prepare Kale/Ricotta Mixture. Saute onion and garlic until cooked mostly through. Add Kale, sprinkle with salt and let it wilt down (cover it to encourage it). Once it has cooked down, remove from heat, add the ricotta, 1 scrambled egg, salt & pepper to taste.

2. Prepare Sauce. Open cans, mix together, add spices

3. Assemble Lasagna.
* One scoop of sauce on bottom of pan
* Noodles
* 1/2 of ricotta mixture
* Noodles
* couple scoops of Sauce & sliced mozzarella
* Noodles
* Remaining ricotta mixture
* Noodles
* Remaining sauce & sliced mozzarella, top with Parmesan.

4. Cook :-) 400F oven for 25 mins covered, 25 mins uncovered. Let rest 5-10 mins. before serving. I served it with some grilled zucchini, and it was good!

5.) Enjoy

UPDATE (9/15/09): I tried this with Beet Greens, and it turned out just as good

Wednesday, July 15, 2009

Week 5 Maple Creek Farm CSA 2009 - July 15


Lots of goodies this week:

Lettuce - Two types. Will use for salads
Garlic - Will cure as they suggest by hanging in a dry, dark place for three weeks.
Patty Pan Squash - Cut up, saute in some olive oil as a side dish
Kale - I will try a veggie lasagna that I usually make with spinach, but will try Kale instead.
Green Zucchini - Zucchini Zoup! (I'll post my recipe after I make it)
Broccoli, Broccoli, Broccoli - YEAH! The kids love Broccoli. So I will make their favorite Broccoli with Pasta. Recipe & Pictures coming. My hubby and I get an adult "sauce" with anchovies and olive oil and they get the kid friendly version with olive oil and a little salt. All made in one pot, its a guaranteed winner!

Tuesday, July 14, 2009

Week 4 CSA Summary & Review


How I used our share this week:

Beets - Made this recipe from the New York Times. Mine looks nothing like their picture, but it tasted REALLY good.
Arugula - Arugula Pizza on Whole Wheat dough as planned
Vitamin Green - Vitamin Greens Salad
Music Garlic - Used it through the week. I have 1/2 of one clove left.
Kohlrabi - sliced it in the food processor and we all had it for a snack.
Squash - Made some Maltese Minestra.

Wheat Muffins and an Egg


This is my favorite morning snack. A hardboiled egg and a wheat muffin with a cup of coffee.

Here is my recipe for the Wheat Muffin:
1 cup whole wheat flour
1/2 cup white flour
1 tsp. baking soda
1/2 tsp. cinnamon
1/4 tsp. salt
1 egg
1 cup of mashed banana or applesauce (or 1/2 cup of each)
1/3 cup honey
1/2 cup milk

1. Preheat oven to 375F. Grease muffin pan or put muffin cups in pan.
2. Mix dry ingredients
3. Mix wet ingredients
4. Combine wet and dry together and put in the pan, filling about 2/3 full.
5. Bake for 15-20 minutes.

Sunday, July 12, 2009

Vitamin Greens Salad


When I asked my husband what he thought about the Vitamin Greens, he said he would describe it as "Salad al dente." A pretty good description because the Vitamin Greens have a soft chewiness to them, similar to a pasta that has been cooked al dente.

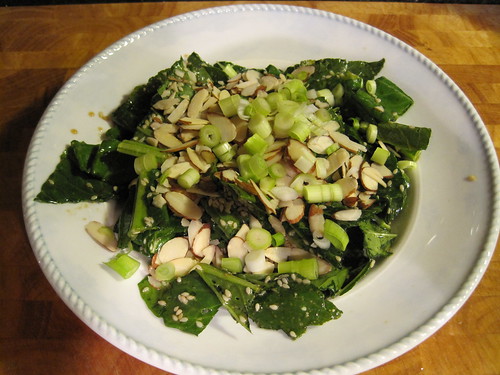
It tastes a little like cabbage, but doesn't have a bitter taste like arugula. We both liked the salad but agreed we would make some changes to what you see above.

I dressed this salad with some green onions. Next time I will leave these off. We both felt they didn't complement the taste of the Vitamin Greens. The sliced almonds are a keeper. What the salad really needed was some sweetness. If had them, I would have added a fresh cut orange to the salad. I think it would have complimented it very nicely and given it some nice color.

I made the vinaigrette below:
1/4 cup canola oil
1/4 rice wine vinegar
1 Tbs Soy Sauce
1 Tbs Sesame Oil
3 Tbs Sesame Seeds

I made a 2nd, more tasty, version detailed in Vitamin Green Salad - Part II

Friday, July 10, 2009

Homemade Salsa Recipe

Homemade Salsa Ingredients

A lot of people have asked me for my salsa recipe, so I am going to post it here in the hopes that other people will find it useful.

Salsa Recipe
10 "on the vine" tomatoes
4 Tablespoons lime juice
3 Tablespoons Hot Sauce (I don't recommend Tabasco, something like Frank's is better)
10 green onions
2 tsp. salt
2 tsp. garlic powder
4 cubes of Trader Joe's frozen cilantro cubes or fresh to taste if you have it.
Fresh ground black pepper to taste

1. Seed the tomatoes

Tomatoes ready to be chopped in Food Processor for Salsa

2. Put them in the food processor and pulse a few time (or use your blender or chop by hand).

3. Put the chopped tomatoes in a colander over a bowl and let the excess water drain (save the strained tomato juice to put in any sauce or soup you are making).

Draining My Tomatoes for Salsa

4. Slice the green onions thin, either by hand or using your 2mm disc on your food processor.

5. Put all of the ingredients in with the drained tomatoes (very top picture) and mix together. You can add any extra hot sauce now if you really want to kick up the spiciness.

Homemade Salsa Finished

Whole Wheat Pizza Dough Topped with Arugula


This is my ABSOLUTE favorite pizza. We discovered it when we lived in Frankfurt, Germany. We made many stops to the local pizza place to get this pizza.

I used this Whole Wheat Pizza Dough recipe from All Recipes, but used my bread machine, and it rose for about 4 hours since I was at work. It was way to moist. When I got home, I worked in another cup of white flour. It wasn't bad, but it wasn't outstanding. I'm looking for outstanding. So I will keep working with it to come up with something that I am happy with.

To make the pizza,
1. Make your dough, roll it out, top with tomato sauce, and fresh mozzarella. Put it in the oven to cook.
2. While it is cooking, wash and dry the lettuce. Dress it with some olive oil, lemon juice, salt and pepper.
3. As soon as the pizza is done, take it out and put the arugula on top.
4. Cut and enjoy. It doesn't get any better.

Wednesday, July 08, 2009

Week 4 Maple Creek Farm CSA 2009

Week 3 Maple Creek Farm CSA 2009

What is in our share this week:
  • Arugula - My FAVORITE. I'll be adding some tomatoes, some thinly slicked Grana Padano, olive oil, Balsamic vinegar and a little S&P. Delicious!!! You really have to smell this stuff.
  • Vitamin Green - The email we got said it was part of the Asian greens family. I'll have to look something up for this one.
  • Music Garlic - As needed through the weeks
  • Kohlrabi - never tried this, looking forward to it. I might just slice it up.
  • Squash - I'll put them in a little olive oil and saute them with the garlic as a side dish
  • Beets - Need to find a use for the beets and greens as this is NOT something I usually cook with, although if I remember correctly, my husband likes them.
btw...I pick these up at lunch time while I am at work, but bring them back up to my office so they don't go 'yuck' in the hot car. I wish you could smell my office, because as soon as you walk it the smell of fresh produce hits your nose. I GUARANTEE that the same veggies bought from the store wouldn't smell this good!

Sunday, July 05, 2009

Week 3 CSA Summary & Review


Here is how I used week 3's share:
Romaine: Chopped it all up to make a salad for my kids birthday party, above.
Garlic Scapes: Made a bean salad out of it and chopped up the rest and put it in the freezer to use later in a bean salad.
Kale: Made the bean & kale soup again tonight. We'll be eating it tomorrow for dinner.
Strawberries: Cut the first one up for my Whole Wheat Pancakes, The 2nd one up for breakfast the next morning, and the 3rd one turned into a freezer jam FAIL because all the sugar sunk to the bottom and it never solidified. I've made cooked jam before with success, and think I will stick with this in the future.

Wednesday, July 01, 2009

Whole Wheat Pancakes with Strawberries

Whole Wheat Pancakes & Fresh Strawberries

When I was a kid, whenever my dad wasn't able to join us for dinner, my mom would always make us something special that wasn't typical dinner fare. French toast, mini-pizzas, pancakes, or tuna cassserole (my dad didn't like it). Tonight, inspired by my husband's absence and the strawberries we got in our share, I decided to make pancakes for dinner.

I make pancakes frequently, usually for breakfast, but for sometime I've been wanting to try to make whole wheat pancakes. My non-whole wheat ones are good, but I've been adding whole wheat here and there to all my other recipes and I figured it was time to finaly add it to my pancakes.

This time I sought out a new recipe rather than trying to modify an exsiting recipe of mine. I started with the recipe from the King Arthur Flour Company (my favorite flour), but made some substitutions/changes based on what I actually had in my pantry.

Here is their recipe

Here is my Whole Wheat Pancakes Recipe:

4 cups King Arthur whole wheat flour
1 cup King Arthur Unbleached All-Purpose Flour
3 1/2 cups oat flour
3 tablespoons sugar
3 tablespoons baking powder
1 tablespoon salt
1 tablespoon baking soda
1 cup vegetable oil

1.) Mix all the dry ingredients together with the paddle on your stand mixer. Then slowly pour the vegetable oil into the dry mixture till it's crumbly. You can do this without a stand mixer, just make sure you don't have any big clumps of oil.

2.) Store the mix you want (1 week room temp in pantry or a very long time in freezer or fridge). My suggestion would also be to write down the remaining steps and ingredients down and tape it to whatever container you store it in, so you don't have to look up the recipe when you are ready to make your pancakes. Something like this:

Whole Wheat Pancake Mix

To finish the pancakes:
1/2 cup Milk
1 6oz. container of plain yogurt
1/2 tsp. orange extract
1 egg

3) Take one cup of the dry mixture and mix it with the wet ingredients. Let it rest for 3o mins.

4.) Pour them by the 1/4 cup onto an hot griddle, flip them, top them, and you are done.

One note: the picture below shows the most bubbles I could get on the top of these pancakes to know when to flip them. If you've ever made non-whole wheat pancakes from scratch you know to look for all the bubbles so you know when to flip them, but I never got the right amount of bubbles on these pancakes.

Whole Wheat Pancake Ready to Turn

Here is the kid version of Whole Wheat Pancakes all cut up and ready to go. I always cut them with a pizza cutter because I find it cuts them without tearing them up like a knife can do...plus it is much faster.

Kid Version of Whole Wheat Pancakes


Week 3 Maple Creek Farm CSA 2009

This week we were given:
* 3 quarts of strawberries
* 1 bunch of kale
* 1 bunch of garlic scapes
* 2 heads of Romain lettuce.

My initial plan to use it up:
* Strawberries: Cut up and eat for snacks for us & the kids
* Kale: I could make the soup again, or I might try something else. Not sure what though.
* Garlic Scapes: More bean salads
* Romain: A Big Salad for my kids family birthday party (they were both born on the 4th of July 2 years apart!!)

I'll post what I really use it for at the end of the week.

Salt in the Baking Powder Can for Easy Measuring

I was flipping through my dad's copy of Cook's Illustrated and saw this great idea to put your salt in an old baking powder container for easier measuring when you are baking.

It is working out great! No more mounds on the top of my measuring spoons that I try and shake level (where I inevitably spill some)!