Wednesday, May 26, 2010

Sanyo Rice Cooker Review

My Sanyo Rice Cooker is one of the kitchen appliances I use ALL the time, probably more than any other appliance I own.  I am going to admit something, before owning a rice cooker, I thought other people who owned them must not have been able to cook.  I mean rice, how hard is it to cook?  Rice, water, and some salt over heat..... Well I was WRONG.  I originally got the Sanyo Rice Cooker because it doubles as a slow cooker and mine had just broken and I had heard that it makes great steel cut oats, which is something that I wanted to get in the habit of making in the morning, but once I tried it for rice I realized how much better rice from a rice cooker can be!

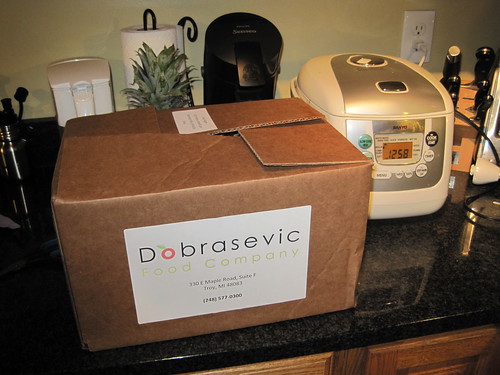
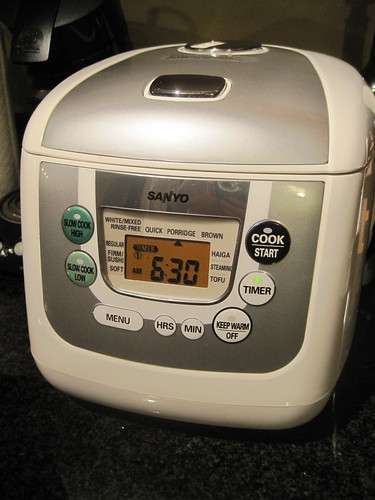
Here is the full review of the Sanyo rice cooker, I elaborate on some additional points below, so scroll down after the video to read more.


This is so much more than a rice cooker.  Here are the features I use the most.

Cook Rice - Brown Rice, white rice, wild rice, this rice cooker makes them all beautifully and consistently every time.    What makes the rice that comes out of this thing so much better than stove-top rice is that there is no room for error.  The entire thing is a sealed unit so everything cooks the same every time you cook it.  All you have to do is press the button and it does the rest.

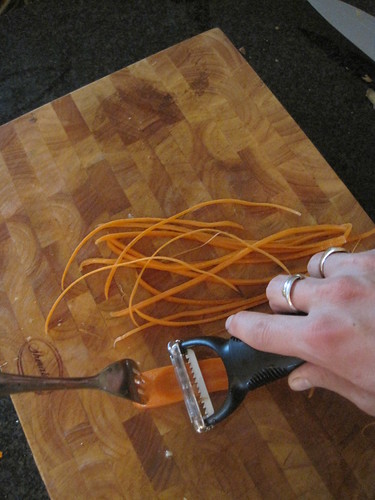
Cook Oatmeal - We use it EVERYDAY to cook our oatmeal.  You can read all about how to use the rice cooker to make steel cut oatmeal here.

Slow Cooker - This also doubles as a slow cooker with two options, slow cook high or slow cook low.  I like to make meatballs and freeze them for anytime use.  So on a pasta night, I will often throw the frozen meatballs and some sauce in the rice cooker and select "Slow Cook High" so that it defrosts and cooks my meatballs in the sauce so they are the perfect temperature whenever the pasta is finished.

Steamer - This comes with a steaming basket so you can steam veggies, eggs, or whatever else you like to steam.  Again, the consistency is amazing.  I like to steam broccoli, and I LOVE that when I set the timer to 14 minutes to steam my broccoli I get the same tenderness that our family likes EVERY time.

Keep Warm - On my days off I usually cook dinner at lunchtime.  If I happen to make a soup or stew that day, I used to wonder what to do since I would be using it in a couple of hours.  Leaving it out seemed like it would spoil, but putting it in the fridge for such a short time seemed weird to, so now I make the soup, throw it in the rice cooker and choose the "keep warm" setting so the soup is ready when we are.

Timer - You have the ability to set the timer so whatever you are making is ready when you are.  The rice cooker has a clock so you program it for the time you want it to finish at, and it does the math for you, automatically turning it on at the right time.  It will finish at the time you set.  I always set our oatmeal for 6:30AM and it is ready then.

Other Features that I Don't Use, But you Might - There are two other features of the Sanyo Rice Cooker that I don't use and those are the ability to make your own Tofu for those who like Tofu.  It also has a great handle and retractable cord on it so you can easily transport the rice cooker from it's storage place to your counter when you want to use it.  I use it so much that I just leave it on the counter all the time.

You can purchase the Sanyo Rice Cooker on Amazon.com

Sanyo Rice Cooker

Products Featured in the Post:

How to Cook Steel Cut Oats in a Rice Cooker

The video below is part of a longer segment I recored about my Sanyo Rice Cooker, and shows how I use my rice cooker to make steel cut oats for my family VERY easily.  Scroll below the video to see a text description.


My husband got me this rice cooker for Christmas last year, but we always joke it was like he bought the gift for himself because he enjoys the steel cut oats so much.

What is awesome about this rice cooker is that you put your oats in the night before, set the timer, and when you wake up your oats are hot and ready to go.  Talk about fast food!  The "keep warm" function will keep your oats at a perfect temperature throughout the morning so each family member can scoop our their portion and eat it warm whenever they want.

To make the steel cut oats in the rice cooker, you will have to use the "Porridge" function.  I fill the measuring cup that comes with the rice cooker with oats so it is level with the top.  Then I pour the water to the 1 line on the porridge column.  Press the menu button until it gets to the porridge setting, press the "timer" button and then "start".  That is all it takes to make your oats for the next morning.

Look for my full review of the Sanyo Rice Cooker shortly!

Products Featured in this Post:

Friday, May 21, 2010

Pantry Commentary 2010

A little less than a year ago I posted a picture of my pantry.  I thought it would be fun to post another picture of the 2010 version of my pantry and compare.

2010 Pantry Commentary
Pantry Commentary 2010

2009 Pantry Commentary
Pantry Commentary

If you want to see how I tagged the pictures, click on them and they will take you to Flickr so you can see the tags

Tuesday, May 18, 2010

How do you Entertain Your Kids While You Cook?

Cooking with real, whole foods can take a little more time in the kitchen.  It can be difficult to find this time when you have young children who need some help entertaining themselves.  Most of the time my kids are pretty good about entertaining themselves, but occasionally they need some encouragement.  My children are almost 3 and 5 now, and I thought I would share with you some of the ways I entertain them while I cook and prep food.  I don't have suggestions for older kids, but I would love to hear yours, so please comment.

1. Picture Books on Tape.  Our library has loads of books on tape, so I throw one in our kitchen CD player for us to listen to while I cook.  They sit at the table and flip the pages (the CD has a little noise that tells your child when to turn the page).  We also talk about the books that we listen to once the story finishes.  
Audio Story Books from the Library

2. Mighty Mind Tiles.  Both of my kids LOVE these cards.  My daughter started doing them at 2 with our help, but now that she is 3, she can do them herself.  The cards are of graduated difficulty so a younger child can do the first cards while an older child can do the latter cards.  You can also buy additional tile sets and cards.  
Mighty Mind Cards and Tiles

3. Ask them what they are going to play with, giving them two options.  I find that asking my kids, "Are you going to play with your legos or the marble blocks?" a much more effective way to get them busy playing something than telling them "Go play with your legos."  The question format makes them feel like they have more control over what they are doing while I am cooking. 

4. Let them help.  I touched on this on in my 20 ways I get my kids to eat healthy post.  There are many ways that your kids can help you cook, even if you are someone who prefers they don't touch the food.  They can use the salad spinner, get things for you, read the recipe for you, etc.

5. Laptop Time.  My kids really like to play the games and watch the videos on sesamestreet.com and the various PBS Kids websites like Sid the Science Kid, Clifford and Curious George.  So I will bring the laptop in the kitchen while my son navigates around the website watching videos and playing games.  I don't like them spending too much time on the computer though, so I set the kitchen buzzer for 30 minutes to keep us both accountable.  When it goes off screen time is over.    

6. Play-doh.  This once can get messy, but if I happen to need a little more prep-time than usual, I get out the play-doh for them and they have a lot of fun.  Sometimes I will let them borrow some of my kitchen stuff so they can "cook" their play-doh.
Play-Doh Time

7. Craft Bucket
One of their favorites is when we get the craft supplies out. They cut, glue, assemble and draw while I cook.  What I really like about the craft bucket is that they are using their imagination to make things and we can talk about those things while I am cooking.
Craft Supplies

That is my list, but I know there are many more ways to entertain kids, what are your favorite ways?


Featured Product:


Sunday, May 16, 2010

How to Make Yogurt

Our family likes to eat a lot of yogurt.  Yogurt can get expensive when every person of our four-member family eats it everyday.  It gets even more expensive because I am picky about how my yogurt is made, what is added to it, etc.  So I have learned to make it myself at home.  It is super easy to do yourself, and once you get in the habit of it, it will become like second nature when you are in the kitchen.

The video below describes how I usually make yogurt, followed by a few notes about making yogurt.


One thing I forgot to mention in the video is that homemade yogurt will be thinner than commercially made yogurt because they add things like dried milk powder to stabilize the yogurt.  Even when you start with whole milk, do not expect to get yogurt as thick as what you buy from the grocery store.  The taste, however, will be the same (probably better).

Needed Equipment: None, you can do this totally without anything more than some milk and a way to heat it up. You don't even need a yogurt maker.  Google has plenty of suggestions on how to make yogurt without a yogurt maker, but I choose to use a yogurt maker and digital thermometer that beeps when my desired milk temperature is reached so I achieve more consistent results.

Featured Products:
    <-- Way too expensive on Amazon.

Wednesday, May 12, 2010

Whole Foods Fast: Learn to Cook Without using Measuring Spoons

Learning to cook without using measuring spoons can save you time in the kitchen, because you can quickly dump in your herbs, spices and seasonings without having to worry about finding or cleaning your measuring spoons between ingredients.

Below I created a video Whole Foods Fast tip that I picked up from The Splendid Table's How to Eat Supper book on how to teach yourself how to measure without measuring spoons.  A text description follows for those of you who prefer text.


First, Grab your measuring spoons

Measuring Spoons

Measure out your ingredient with the measuring spoon and then put it in your hand.  Note what each volume looks like in your hand.

quarter-teaspoon quarter hand only

half-teaspoon half-teaspoon-hand

one teaspoon one teaspoon hand

For the next couple weeks measure the same way; into your measuring spoon, then into your hand, and then into your pot.  After awhile you should get the hang of what each measurement looks like in your hand.  

Kids Konserve Set of Stainless Steel Nesting Containers Review (with Video)

Kids Konserve Nesting Bowls from ReusableBags.com

One of my favorite websites to shop from is Reusit.com.  They have an awesome selection of reusables for your home, office, school, car - basically just life in general.  I prefer to use reusable containers because it saves me money and prevents waste.

Here is my video review of the Kids Konserve Set of Nesting Stainless Steel Containers.  A Text Review follows the video for those of you who prefer reading.


I got this set of containers because although I really like the snacktaxis, there were times that I wanted to be able to put things in my son's lunch that couldn't be served in a snacktaxi.  Things like, applesauce, yogurt and tomatoes with olive oil.  Glass is breakable and I worry about plastic, so stainless steel was my material of choice.

Capacity - The smallest container (orange lid) holds 3/4 cup.  The medium container (green lid) holds 1 and 1/4 cup.  The largest container (army green lid) holds 2 and 1/4 cup.

Lids - The top of the lids, except for the tine indentation along the edge are flush with the top of the stainless steel container.  This is awesome, because you loose very little capacity when filling them up with your food.

Leak Proof - It is nice to not have to worry about liquids leaking out of these containers.  This means you can store applesauce or yogurt in there and not have to worry about it spilling all over your child's lunch box.

Storage - Anyone who has trouble finding space to store things in their kitchen will appreciate the fact that these nest together so storage isn't a problem.  Nor is brining them with you on vacation or field trips because when you are done eating, they fit back into each other.

I am very happy with the Kids Konserve set, here are two photos from the video that show the capacity of the medium and large size containers.

Kids Konserve

Purchase the Kids Konserve Nesting Set on ReusableBags.com (the website will soon be re-named reusit.com)

Monday, May 03, 2010

My Favorite Things: OXO Julienne Peeler

OXO Julienne Peeler

My OXO Julienne Peeler isn't perfect, but there is still much to like about it!

I can easily julienne carrots for stirfrys

OXO Julienne Peeler

Or Cucumbers for this yummy, Tomato and Cucumber Spaghetti Salad (recipe follows):


The major flaw the OXO julienne peeler has is that you are left with some extra pieces of whatever you are julienning from the way you have to use it.  I don't mind the extras for carrots because I make my own stock and I just throw the pieces in the freezer to save for my next batch of broth.  When I am making things like the cucumber salad pictured above, I just chop up the remaining pieces with a knife and put it in with the rest of the salad.

Tomato and Cucumber Spaghetti Salad Recipe
3 large tomatoes (like Hot House)
1 medium cucumber (peeled, cut in half, with the seeds scraped out)
2 Tablespoons Organic Olive Oil
1 Tablespoon high-quality Balsamic Vinegar
salt & pepper to taste.

1. Chop up the tomatoes to your desired size (I prefer large chunks for this salad)
2. Use the julienne peeler to make your cucumber into "spaghetti" and mix in with the tomatoes.
3. Sprinkle salt and pepper over the tomatoes and cucumbers.
4. Mix the Olive Oil and Vinegar together and pour over salad.


A quick, easy, and fun summertime salad compliments of the OXO Julienne Peeler.

Featured Product: